A quick overview of how to make a paperski.
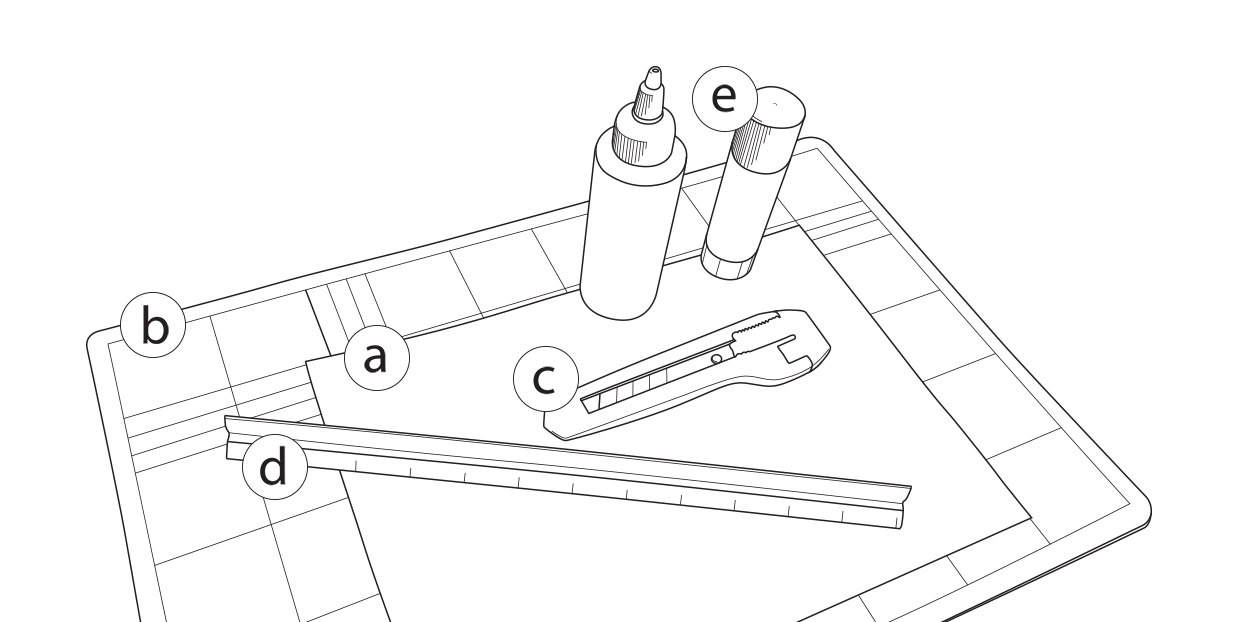
Materials you might need:
a: a print of your favourite paperski, A4 by default, but larger or smaller as you wish.
You may want to use some thicker paper or card to make it sturdier, but not too thick.
b: cutting mat or similar.
c: craft knife or cutting utensil.
d: metal ruler (or plastic, but the knife will damage it eventually).
e: glue (optional).
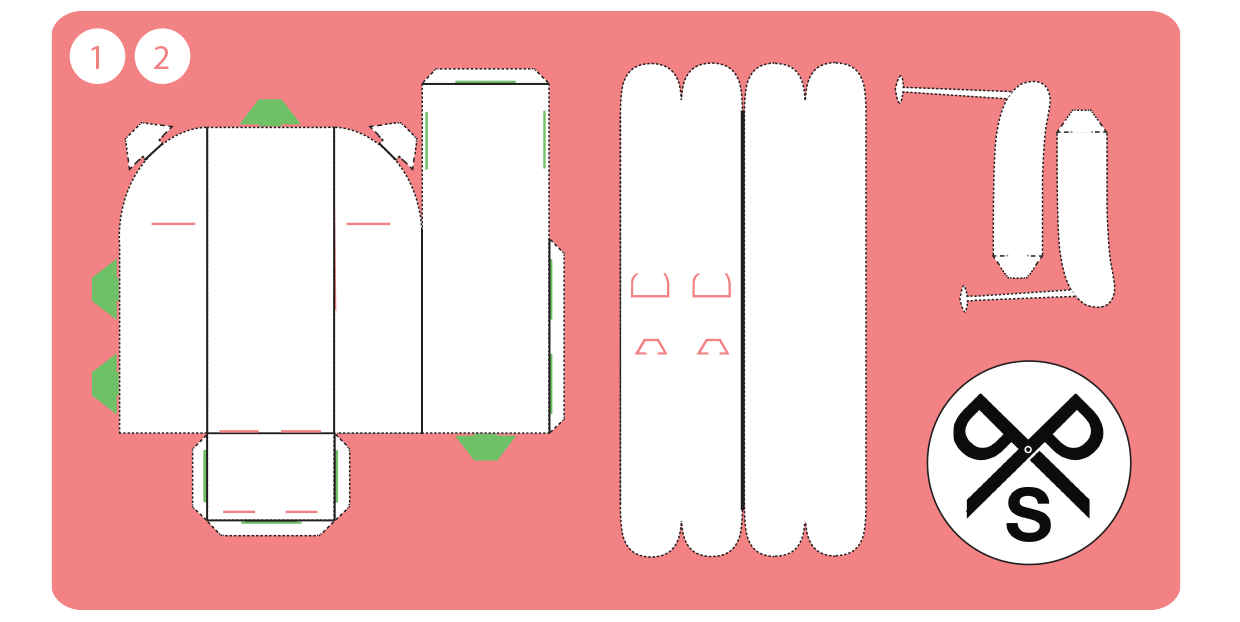
1: The solid black lines in the image above show where you will be folding – drag the back of your craft knife along these lines with a bit of pressure, using a ruler, giving you much cleaner folds when you’re putting it together.
2: Cut around the dotted lines in the image above, so that all the red has been cut out. Also cut through the red lines. If you don’t want poles, cut them off.
The green tabs are pieces you only have to cut out if you’re making a glueless paperski, otherwise get rid of them (a glueless paperski can be made without glue, and can be taken apart again, but isn’t as sturdy as one that’s been glued together).
It’s a good idea to pre-fold everything now, making it easier to stick together.
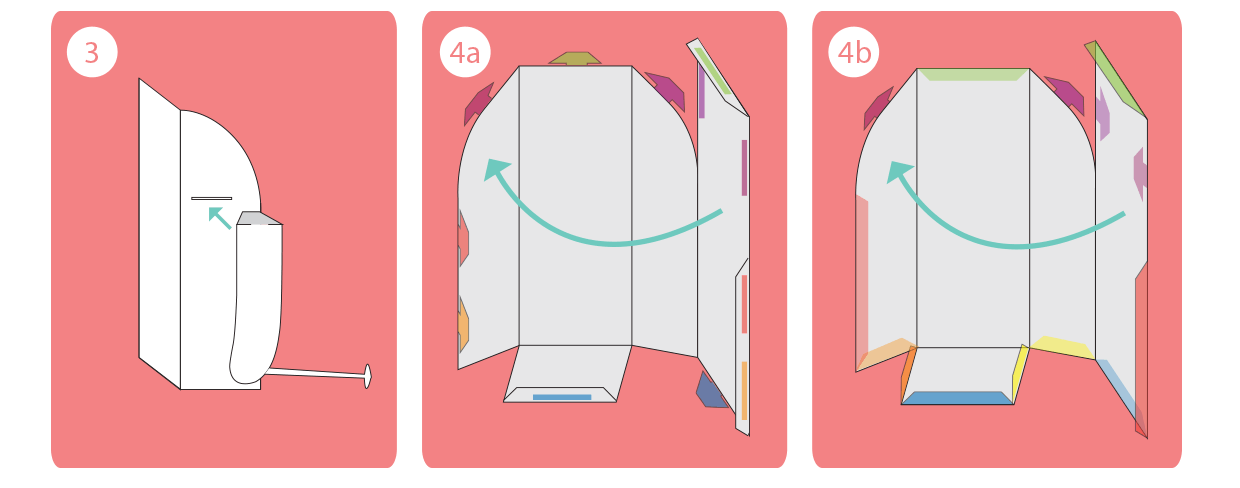 3: This is the best time to put the arms in. Stick them into the slots on the skiers sides.
Glue them onto the inside if you’d like, but they should hold fine without, and then you can swap arms later if you want to.
4a: If you’re making a glueless paperski, slot the coloured tabs into the cut of the same colour in the diagram above. Make sure all the tabs are going to end up inside the figure. You now have a finished skier!
4b: If you’re making a paperski with glue, simply glue all the coloured tabs to the inside of the skier, into the same colour cuts as in the diagram above. You now have a finished skier!
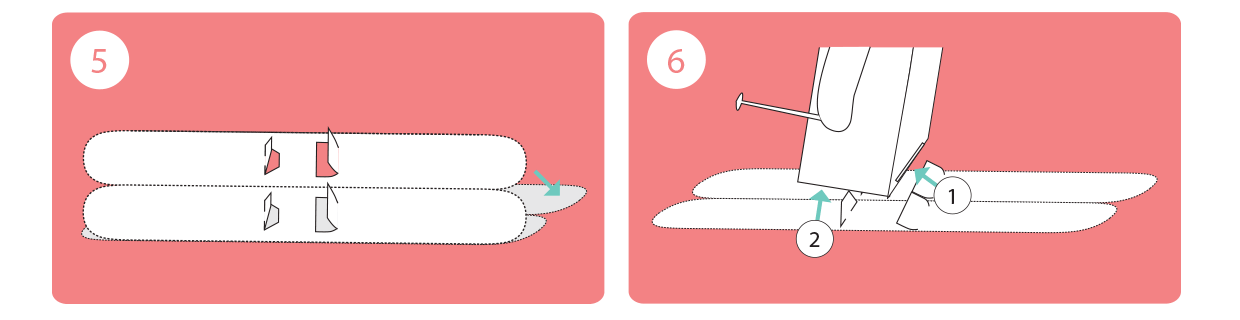
5: Onto the skis! Make sure you’ve folded up the tabs on the skis, like in the picture, so that they don’t get stuck down as well. Then, fold the base under, and glue the two sides together. Even if you’re working with glue, I wouldn’t glue the skier onto the skis, so you can swap skis later!
Bend the finished skis into whatever type of camber or rocker etc suits you.
6: To get the skier into his ‘bindings’, push the front tabs in first (1), and then push him down onto the back tabs (2), just like you do when you step into your skis!
All done! Enjoy!